Summary
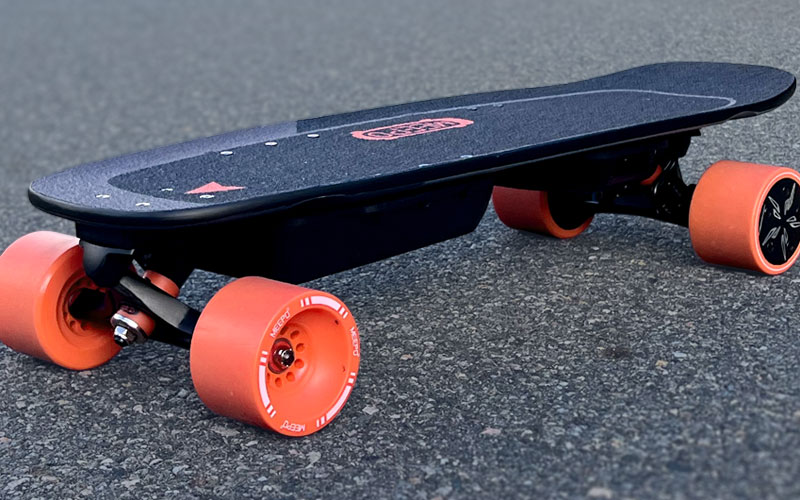
This is a mellow electric surfskate cruiser. It’s built for a smooth, flat-riding environment. The goal was to create something that replicates surfing an endless wave on a longboard surfboard.
Setup Price: $880ish
Ideal Speed: 8-12mph
Riding Style: Mellow Surfskate
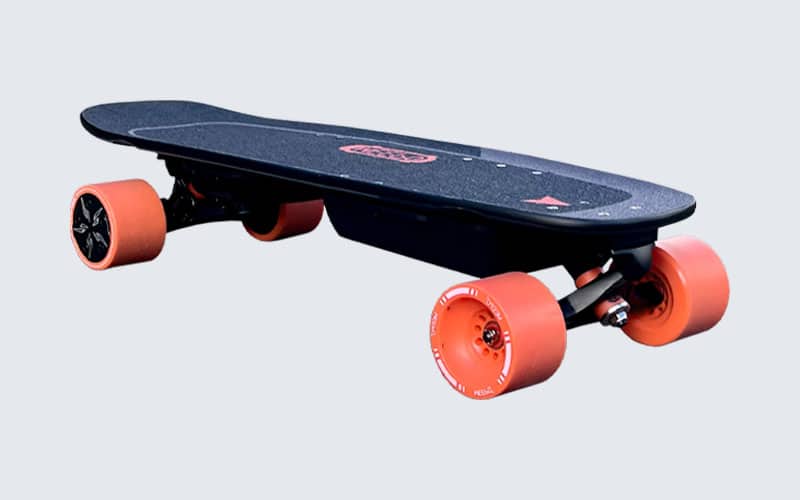
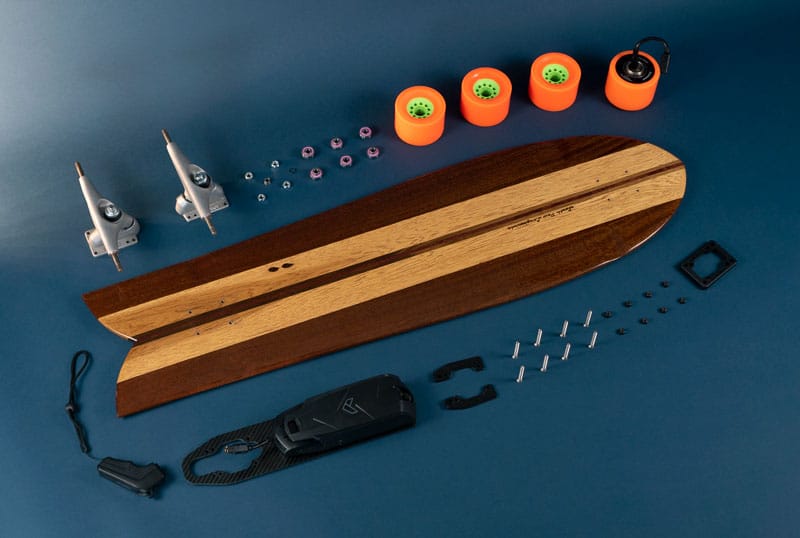
Parts Breakdown
- Unlimited x Loaded Kit
- South Paw Longboard Deck
- 85mm Orangatang Caguamas
- Carver CX Trucks
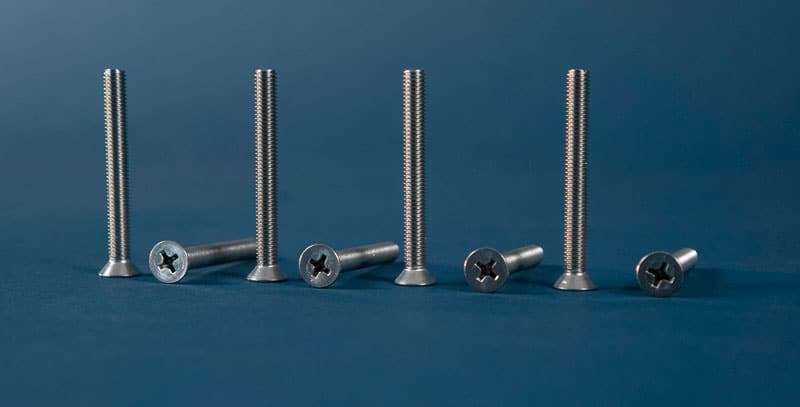
- 2″ Stainless Steel Bolts
- (4) 1/8″ Riser Pads
Disclaimer: Some of the links above are affiliate links. Meaning if you buy something after clicking them, we will receive a small commission. It’s at no additional cost to you. This does not affect what products or prices are displayed.
I’ve wanted to build an electric surfskate for a long time because the feeling I got on my first electric skateboard felt like riding an endless wave.
I first started experimenting when I bought my Revel Kit, pairing it with various pivoting adapters – YOW,
But there was always a disconnect between the pivoting adapter and revel’s truck in the back. The adapters turned too aggressively for the revel kit to feel right.
Ultimately I dialed in my favorite Revel setup that used Orangatang bushings (front & back) and a 50° Paris RKP in the front. That’s my go-to electric skateboard when I want something surfy-ish.
But I still felt like I could push this electric surfskate concept further.
So when my dad asked me to build him an electric setup for his 60th birthday, I knew this was the time for that. You can see all the parts of the setup below.
Let’s get into the process of building this.

By entering your email address you agree to receive emails from Concrete Waves. We'll respect your privacy and you can unsubscribe at any time.
Define Riding Style
The first thing I started with was defining his riding style and environment.
Lowkey, surfy carves, mainly on smooth, flat side streets.
The goal is to create something that replicates surfing an endless wave. My dad’s a longboard surfer, so a longer wheelbase with more mellow surfskate trucks was the move.
Defining this early on sets a solid foundation for picking the components.
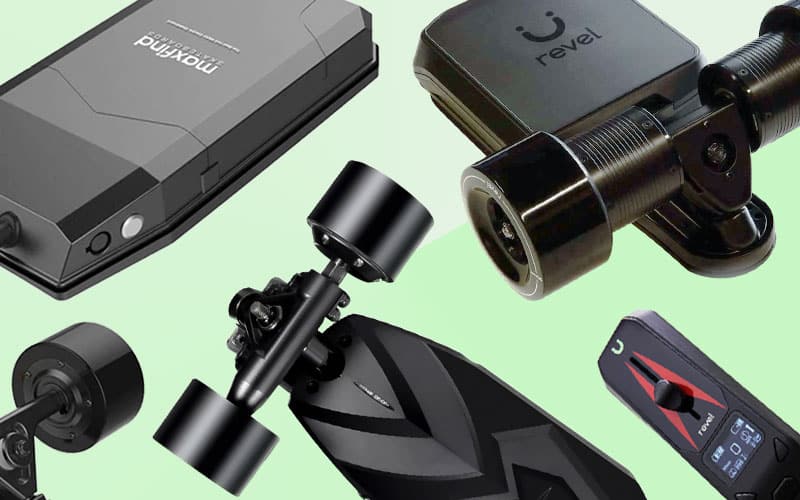
Electric Kit
I started by picking out the electric kit, which ended up being the Unlimited x Loaded.
I went with them mainly because I didn’t want to get into the technical DIY build-your-own battery side of things, but I still wanted the freedom to use any truck.
And the Unlimited kit allowed me to do that.
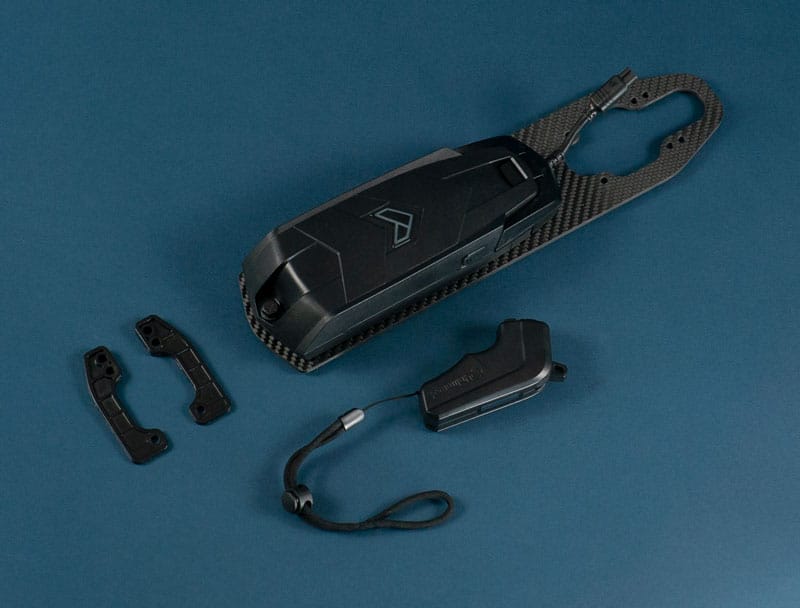
Unfortunately, they went out of business while I was building this setup. Which is a major bummer because now I don’t think there’s a kit that allows you to use any truck without having to build your own from scratch.
The Unlimited kit is a collab with
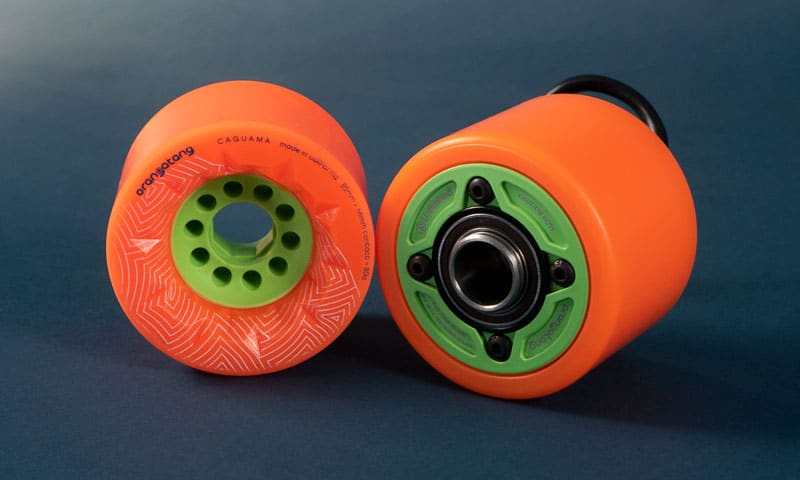
Right off the bat, the kit, wheels, and bearings are locked in.
I had two main priorities for the deck…
- Ride like a longboard surfboard
- Have a surfy aesthetic
Drawing inspiration from the shape of an Alaia surfboard. My dad and I have always been fascinated with fish shapes, so this seemed like the perfect design.
With most electric setups, you’ll find concave because of the higher speeds. But since this is a mellow setup, there doesn’t need to be. Plus, my dad has a shoe size 12 US men’s, and he’s not a fan of concave.
Anytime I have him ride my concave setups, it bothers him.
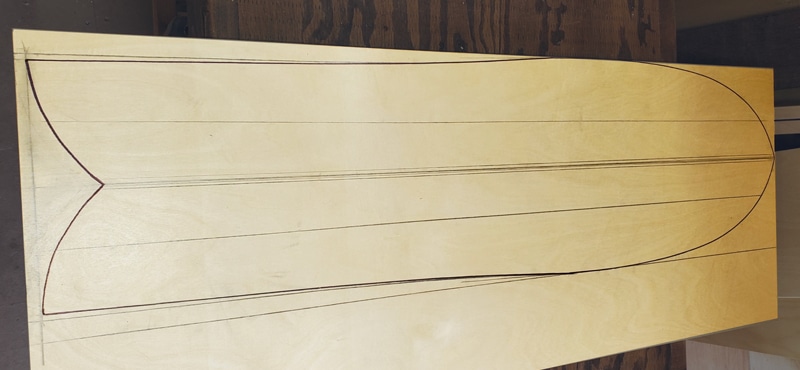
So, with all this info, I hit up my friend Jason who goes by South Paw Longboards. He was the perfect person to make this deck. After sharing the vision with him, he was stoked and immediately started brainstorming.
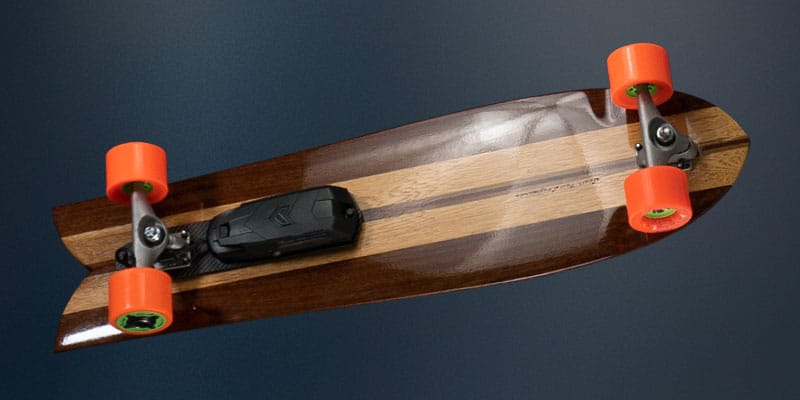
After talking with him, he drew up a shape within a few hours. It was exactly what I envisioned – see it below.
I asked Jason to share his deck-building process, which goes as follows.
“I like using harder wood for the center or spine of the board where the trucks will bolt. In this case, I used Hickory with black walnut and purple heart stringers with mahogany for sides.”
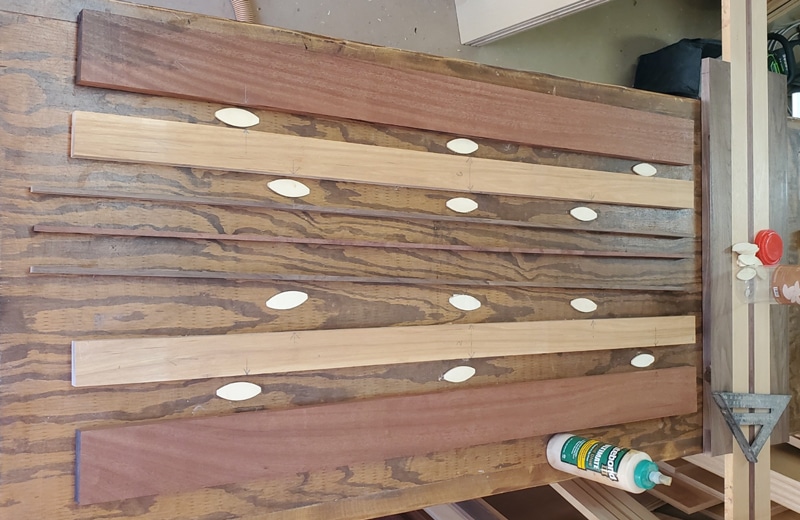
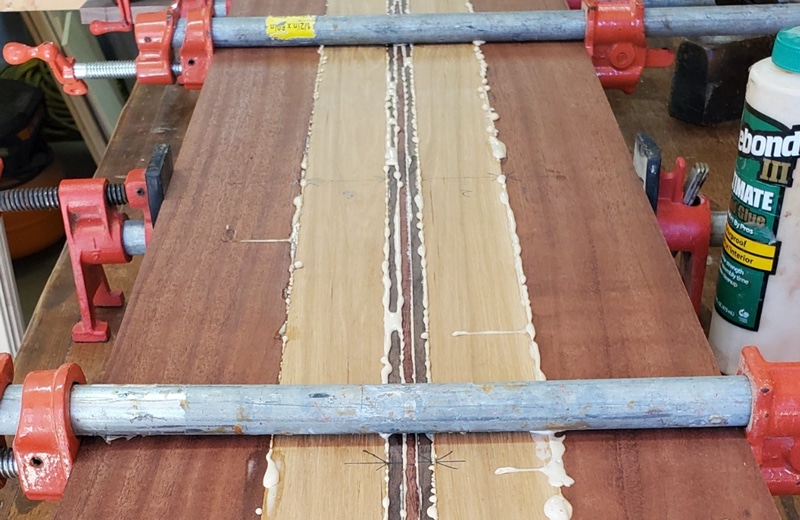
“Next is the glue up. I always use titebond 3. It’s the best in my opinion. I give it a day to dry. Then, I run it through a planer to flatten it out. I have some pre-made shaping templates to dial on the shapes. Once I cut the outer shape, I lay out the truck placement and drill the holes.”
“Next, I’ll use a few different tools to start shaping. Router and disk sander for rough shape and palm sander and hand sanding to smooth it out. Similar to how surfboards are shaped.
Then it’s ready for finish and grip. I use a Spar urethane made for boats and outdoor use. I do an initial prime coat, sand, and then a heavy top coat to embed the glass bead grip. Once dry, additional three coats to lock in grip and seal the whole board.”
The final result is below. What a freakin’ beaut! Thanks Jason.
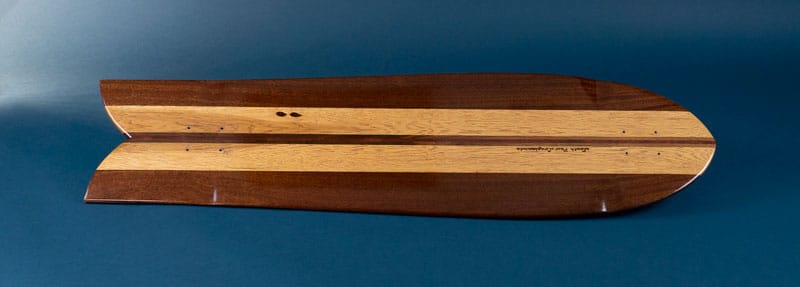
The first time I showed it to my dad, he wanted to hang it on the wall.
“Dude, this is an art piece, I don’t know if I can ride this. Let’s hang it on the wall”
He’s got a point. Every time I get a new deck, I go through that same thought process.
Trucks
As I briefly mentioned in the beginning, I didn’t want to use surfskate pivoting adapters because it didn’t make sense for my dad’s riding style (mellow carving).
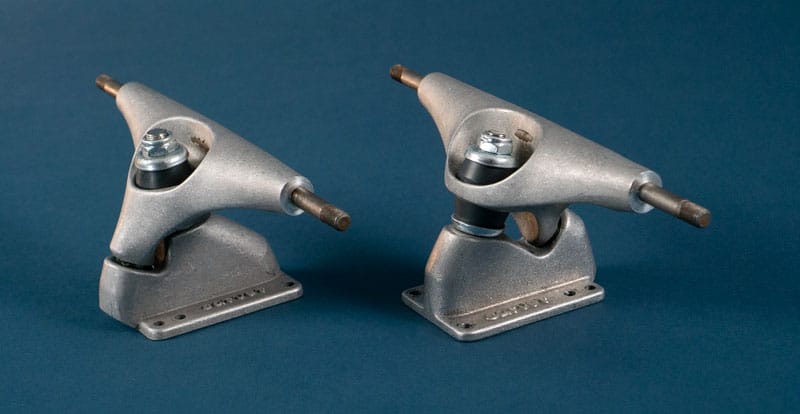
I picked a Carver CX setup (CX front truck and C2 back truck) for two main reasons.
- It works well with a longer wheelbase
- Simple bushing-based design = easy maintenance/ less likely to break
Stock bushings left in – didn’t want to get too crazy. Carvey enough for what my dad wanted.
I ended up shipping Jason (deck builder) the Carver CX setup with wheels so he could sand custom wheel wells in the right position. Wheelbite was still an issue because you must use larger 85mm+ wheels with electric kits.
I’ll go over how I addressed it in the next section.
Hardware & Risers
The hardware is 2″ stainless steel counter sunk Phillips head. I used Phillips head because that’s what I had lying around, but if I had the choice, I would’ve gone for socket bolts. Mainly because they’re less likely to strip than Phillips bolts.
Let’s talk about wheelbite and risers. I tried riding it without risers because I wanted it to be as low to the ground as possible. But that’s pretty much impossible with 85mm wheels and surfskate trucks.
After trial and error, I put (3) 1/8″ riser pads in the front, totaling 3/8″ (0.375″ or 9.53 mm). And (1) 1/8″ (0.125″ or 3.18 mm) riser pad in the back.
This eliminated almost all wheelbite. Keyword there is “almost” because you can still get it if you try turning aggressively under 5mph. So if you end up doing a similar setup, be cautious.
Finally, after putting all the components together, it was time to ride it.
Riding Feel
Right away, this thing brought a smile to my face. But the best part was watching my dad’s love for skateboarding reignited. He’s incredibly stoked on it and rides it every single weekend.
This setup was much different than slapping a surf adapter on my Revel Kit. The longer wheelbase with Carver CX setup makes for a killer ride. It just feels right.
It’s tough to capture it in words. If you ever have the chance to build something like this, DO IT.
Bottom Line
I built this for my dad, but it’s gonna be hard to let this one go. After I save up a little more, I will push this concept further and build my own.
The goal was to create a mellow electric surfskate, and I’m stoked to say it rides like a dream.